For any business, the task to remove a hard drive from a laptop is more than a simple technical procedure; it's a critical step in the IT asset lifecycle that carries significant security and compliance implications. Before a screwdriver is even considered, a structured approach is essential to prevent data loss, regulatory penalties, and device damage. For businesses in Atlanta, Georgia, managing this process correctly is vital for protecting sensitive corporate data.
Properly planning the removal and subsequent disposal of a laptop hard drive ensures the entire process—from data backup to certified destruction—is handled with the security and professionalism required in a corporate environment. This guide outlines the best practices for IT managers and procurement professionals overseeing these tasks.
Critical Preparations Before You Remove a Laptop Hard Drive
In a business setting, the preparatory phase before hardware removal is non-negotiable. Bypassing these initial steps can lead to severe consequences, including irreversible data loss, compliance breaches under regulations like HIPAA or GDPR, and significant operational downtime. A methodical plan is the most effective defense against these risks.

Prioritize Your Data Backup Strategy
The single most critical action before any hardware intervention is executing a complete and verified data backup of all business-critical files. A robust backup is the only effective safety net against data loss during the removal process.
The appropriate backup strategy depends entirely on the laptop's next intended use within the organization.
- Full System Image: This method is ideal when upgrading a user's storage drive. It creates an exact, bootable replica of the entire system, including the operating system, applications, and all user files. This facilitates a seamless transition to a new drive with minimal disruption to the user's environment.
- File-Level Backup: When a laptop is being decommissioned, a file-level backup is more efficient. This approach involves migrating only the essential business data (e.g., documents, spreadsheets, project files) to a secure network share or enterprise cloud storage solution. Cloning the entire system is unnecessary for retired assets.
Maintain Meticulous Asset Documentation
Within a corporate IT fleet, undocumented hardware modifications create significant compliance and security vulnerabilities. Before a hard drive is removed, comprehensive documentation is essential to maintain a clear and auditable chain of custody.
Detailed asset logging is not merely good practice; it is a foundational requirement for demonstrating due diligence during security audits. It proves that sensitive data was tracked and managed responsibly from device decommissioning to final disposition.
Your IT asset disposition log must capture the following key details for each device:
- Asset Tag Number: The unique internal identifier for the laptop.
- Laptop Serial Number: The manufacturer's serial number for the device.
- Hard Drive Serial Number: The unique serial number of the storage drive itself.
- Assigned User: The employee to whom the laptop was assigned.
- Date of Removal: The precise date the hard drive was physically extracted.
This log forms the basis of your IT Asset Disposition (ITAD) records and is the first link in a process that concludes with certified data destruction, a procedure detailed in our guide on understanding NIST 800-88 guidelines.
Review Warranty and Service Agreements
Opening a laptop chassis can immediately void the manufacturer's warranty. For a business, this introduces a financial risk that must be evaluated, particularly for newer or high-value devices still under warranty coverage.
Before proceeding, review the device's service agreement. Some enterprise-level support contracts may permit self-service component replacement by certified internal IT staff. However, for most standard commercial-grade laptops, any unauthorized internal modification is a financial liability.
If a laptop is under warranty, weigh the potential future repair costs against the immediate need for drive removal. If the objective is data security for a device designated for recycling, the warranty is moot. However, if the intent is to repair or redeploy the laptop, voiding the warranty could transform a simple drive swap into a costly out-of-pocket repair.
A Hands-On Guide to Removing Different Laptop Hard Drives
The physical removal of a laptop hard drive requires precision, the correct tools, and a clear understanding of the hardware involved. While laptop models vary, the core procedures for extracting the three most common drive types—2.5-inch SATA, M.2 SATA, and M.2 NVMe—are fundamentally consistent.
An improper removal can cause damage to the drive, motherboard, or other fragile components, escalating a routine task into an expensive repair. This knowledge is foundational for any IT team tasked with safely and confidently managing hardware decommissioning.
Assembling Your Toolkit
Organizing the proper tools before starting work is essential for a safe and efficient process. A professional toolkit for this task includes several non-negotiable items.
- Precision Screwdriver Set: Laptops utilize small screws, typically Phillips #00 or #0. Some models, such as MacBooks, may use Pentalobe or Torx screws. A high-quality set with magnetic tips is invaluable.
- Anti-Static Wrist Strap: Electrostatic discharge (ESD) is a primary cause of damage to electronic components. An anti-static strap grounds the technician, preventing silent damage to the motherboard or drive.
- Plastic Pry Tools (Spudgers): Using metal tools to open a laptop case can cause cosmetic damage or cracks. Plastic spudgers are designed to safely release the clips securing the chassis without scratching the device.
- Small Parts Tray: A magnetic tray or compartmentalized container is crucial for organizing the numerous small screws removed during disassembly, ensuring they are not lost.
Using the right tools mitigates the risk of damage associated with improvisation.
Removing a Traditional 2.5-Inch SATA Drive
The 2.5-inch drive, whether a legacy Hard Disk Drive (HDD) or a modern Solid-State Drive (SSD), is the largest form factor found in laptops. It has been a standard for many years, and its removal is often the most mechanically intensive.
First, power down the laptop, disconnect it from AC power, and remove the external battery if applicable. Flip the device over and inspect for a dedicated hard drive access panel, often secured by one or two screws on older models.
More commonly, the entire bottom case must be removed. This typically involves unscrewing 8 to 15 screws from the perimeter and, occasionally, from beneath rubber feet. Once the screws are out, use a plastic pry tool to gently work around the seam and disengage the plastic clips.
Inside, the 2.5-inch drive will be housed in a metal bracket or caddy, which is screwed into the laptop's frame. First, unscrew this caddy. Next, slide the drive horizontally to disconnect it from the motherboard's SATA port. The drive and caddy will lift out as a single unit. Finally, remove the screws securing the drive to the caddy.
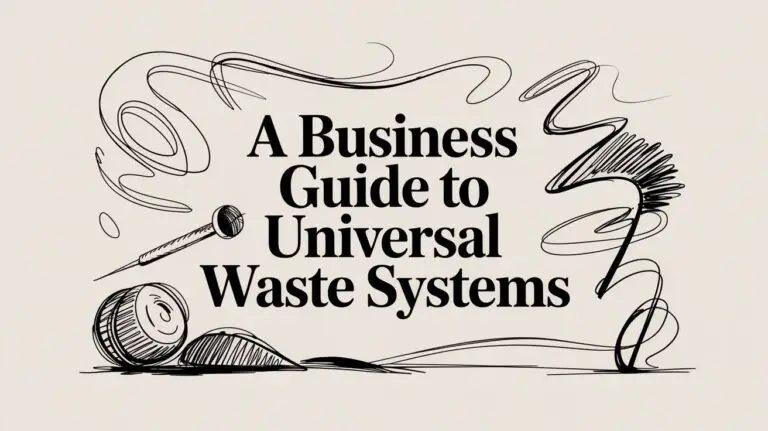
This visual guide outlines the essential preparation workflow that must precede any hardware intervention.

Adhering to this sequence—backup, documentation, and warranty verification—ensures all corporate governance requirements are met before physical work begins.
Removing Modern M.2 SSDs (SATA and NVMe)
Most contemporary, thin-profile laptops utilize M.2 solid-state drives. These drives resemble small memory modules and connect directly to the motherboard, making their removal simpler yet more delicate. While M.2 SATA and M.2 NVMe drives employ different protocols, their physical removal process is identical.
M.2 drives are secured by a single screw at the end opposite the connector. This design allows for quick removal but requires careful handling to avoid damaging the exposed drive or motherboard connector.
With the bottom case removed, locate the M.2 drive on the motherboard—it is a small, flat rectangular card.
First, remove the single small Phillips head screw at the end of the drive.
Once the screw is removed, the drive will automatically pop up to a 20-30 degree angle due to the spring tension in the M.2 slot. This is normal behavior.
Next, grasp the drive by its edges and gently pull it straight out of the slot. Avoid wiggling it, as this can damage the delicate connector pins.
Because M.2 drives lack a protective caddy, they are highly susceptible to ESD and physical damage. Always handle them by their edges and place them immediately into an anti-static bag. For further details, consult our comprehensive guide on how to remove a hard drive from a laptop. Mastering these procedures enables your team to manage any hardware configuration professionally.
Understanding Drive Types and Their Removal Quirks

Before disassembling a laptop, identifying the internal hard drive type is crucial for an efficient and damage-free removal. Not all drives are interchangeable, and knowing the specific form factor and connection interface helps prevent stripped screws, damaged connectors, and wasted time. This is especially true when you need to remove a hard drive from a laptop across a diverse fleet of corporate devices.
To assist your IT team, this section provides a comparative overview of the most common drive types and their typical removal processes.
At-a-Glance Comparison of Laptop Drive Types
| Drive Type | Form Factor | Interface | Common Removal Steps |
|---|---|---|---|
| HDD & SATA SSD | 2.5-Inch Box | SATA | Unscrew caddy from laptop, slide drive out, unscrew drive from caddy. |
| NVMe & M.2 SSD | Small "Stick" | M.2 (NVMe/SATA) | Remove one small screw, let drive pop up, gently pull from slot. |
Recognizing these distinctions allows technical staff to operate more safely and efficiently, whether managing a single laptop or a large-scale hardware refresh project.
The Classic 2.5-Inch HDD and SATA SSD
Laptops manufactured more than a few years ago typically contain a 2.5-inch drive. This box-like form factor was the industry standard for both traditional spinning Hard Disk Drives (HDDs) and early-generation Solid-State Drives (SSDs) using the SATA interface.
Due to their size and the fragile moving parts within an HDD, these drives are almost always secured in a protective metal caddy. This caddy is then screwed into the laptop's frame to absorb shocks and prevent movement.
Extracting a 2.5-inch drive is a multi-step process. The technician must first unscrew the caddy from the laptop chassis, then carefully slide the entire assembly to disconnect it from the motherboard's SATA port. Finally, the drive is unscrewed from the caddy. This is the most mechanically involved removal procedure.
You can take a closer look at these and other connectors in our guide to the various types of hard drives and their connections.
The Modern M.2 NVMe and SATA SSDs
Modern thin-and-light laptops have transitioned almost exclusively to the M.2 form factor. These components function as drives but resemble small sticks of RAM.
M.2 drives plug directly into the motherboard and are available in two main variants: the high-performance NVMe (Non-Volatile Memory Express) and the standard M.2 SATA. Fortunately, the physical removal process for both is identical.
This design is simultaneously simple and fragile.
An M.2 drive is held in place by a single, tiny screw. Once that's out, the drive itself will pop up at an angle, and you can gently pull it free from its slot.
The absence of a caddy or extra cables streamlines the removal but leaves the drive's sensitive components fully exposed. The single screw and delicate gold connectors necessitate a steady hand and the use of an anti-static wrist strap to prevent accidental damage.
What to Do With the Hard Drive After Removal
Once a hard drive has been successfully extracted from a laptop, the most critical phase of the ITAD process begins. The removed drive is now a portable data liability. Storing it on a shelf or in a drawer is a security risk that no business should accept.
The handling and disposition of these drives are governed by corporate responsibility, data privacy regulations, and the imperative to protect sensitive information. Mishandling this stage can lead to severe data breaches, substantial fines, and irreparable damage to your company's reputation.
The Myth of Deleting and Formatting
A common misconception is that deleting files or performing a standard format is sufficient to secure data on a retired drive. This is a dangerously false assumption in a business context.
Simply deleting files does not erase the data; it only removes the pointers that the operating system uses to locate the files. The underlying data remains on the drive and is easily recoverable with widely available software tools.
Similarly, formatting a drive is inadequate for corporate data security. A standard format prepares the drive for a new operating system but often leaves the original data intact and recoverable. For any organization handling customer information, financial records, or intellectual property, these methods are non-compliant and unacceptable.
Secure Data Disposition Methods Explained
To permanently eliminate data and meet regulatory compliance standards, businesses must use one of three professional methods: sanitization, degaussing, or physical destruction. The appropriate choice depends on data sensitivity, drive condition, and asset reuse strategies.
- Data Wiping (Sanitization): This software-based method overwrites the entire drive with random binary data (ones and zeros) multiple times. A proper sanitization process, adhering to standards like NIST 800-88, ensures the original data is completely irrecoverable. This is the optimal method for securely reusing a drive or maximizing its value through resale.
- Degaussing: This method applies to magnetic media, such as traditional Hard Disk Drives (HDDs). A powerful degausser exposes the drive to an intense magnetic field, which instantly and permanently scrambles the magnetic platters where data is stored, rendering the drive unusable.
- Physical Destruction (Shredding): This is the most definitive method of data destruction. An industrial-grade shredder grinds the hard drive into tiny, unrecognizable metal fragments. This is the gold standard for disposing of drives with highly sensitive data or for drives that are non-functional and cannot be sanitized.
Selecting the right method is essential for compliance with regulations such as HIPAA for healthcare data or the FTC Disposal Rule for consumer financial information.
The Non-Negotiable Role of a Certified ITAD Partner
For most businesses, managing this process internally is impractical and exposes the company to unacceptable risk. Partnering with a certified IT Asset Disposition (ITAD) vendor like Beyond Surplus is a strategic imperative. A professional partner provides a secure, compliant, and fully documented process from start to finish.
The global hard drive destruction service market is expanding rapidly, driven by heightened data security concerns and stringent new regulations. In 2024, the market was valued at USD 1.65 billion and is projected to reach USD 5.05 billion by 2035, with a compound annual growth rate (CAGR) of 10.7%. This trend underscores the critical importance of certified destruction services. You can learn more about this growth in this detailed industry report.
A certified ITAD vendor offers secure logistics for transporting drives, maintains a strict chain of custody, and performs destruction using audited and compliant methods. This professional oversight is what truly mitigates corporate risk. For a closer look at this topic, you can also check out our guide on what to do with old hard drives.
The Importance of the Certificate of Data Destruction
Upon completion of the process, the single most important document you will receive is a Certificate of Data Destruction. This legally binding document serves as official proof that the data was destroyed in a compliant and secure manner.
This certificate must always include:
- A unique serial number for tracking purposes.
- The exact date of destruction.
- The method of destruction used (e.g., shredding, wiping).
- An inventory of the serial numbers of the destroyed hard drives.
- A statement transferring liability from your organization to the ITAD vendor.
In the event of a security audit or legal inquiry, this certificate is your definitive proof of due diligence. It demonstrates that you took all necessary steps to protect sensitive information and effectively transfers the liability for that data to your certified partner. Without this documentation, your business remains exposed to significant legal and financial risks.
Why Professional Electronics Recycling Is a Smart Business Move
After removing the hard drive, you are left with a sensitive data-bearing device and the remaining laptop chassis. While the previous section addressed securing the drive, the disposition of the asset itself must also be managed professionally. Storing old laptops in-house is not a sustainable strategy—it's a liability that accumulates over time.
Engaging a professional electronics recycling service is not merely an environmental initiative; it is a sound business decision and a fundamental component of modern corporate risk management.
Navigating the Risks of Improper Disposal
Disposing of old corporate laptops in a standard dumpster can lead to severe consequences. Environmentally, e-waste contains toxic materials like lead and mercury, and improper dumping is illegal in many jurisdictions, leading to substantial fines.
More importantly, data security risks remain. While removing the hard drive is a primary step, other components, such as solid-state caches on motherboards, can retain data fragments. A discarded laptop bearing a company asset tag provides a direct link back to your organization, creating a public relations crisis if discovered in a landfill.
The Growing E-Waste Challenge
The scale of the global e-waste problem is staggering. Electronics represent the fastest-growing waste stream worldwide. In 2022, a record 62 million tonnes of e-waste were generated, yet only 22.3% was properly collected and recycled. This leaves a vast quantity of hardware to either contaminate the environment or expose sensitive data.
This is not an abstract issue. You can discover more insights about the global e-waste crisis here, and every retired corporate laptop contributes to this growing problem.
For any business, this is a direct operational concern. Your company's approach to managing its retired assets reflects its corporate values and its commitment to risk management.
Turning Retired Assets into Strategic Advantages
The challenge of e-waste also presents a strategic opportunity. Partnering with a certified electronics recycler like Beyond Surplus transforms a disposal liability into a strategic advantage with tangible business benefits.
Responsible IT asset disposition generates value in several key ways:
- Boosts Your Corporate Social Responsibility (CSR) Profile: Demonstrating a tangible commitment to sustainable practices enhances your brand's reputation among customers, partners, and prospective employees who prioritize environmental stewardship.
- Ensures Ironclad Compliance: A certified partner guarantees that your e-waste is managed in accordance with all local, state, and federal regulations, providing the necessary documentation to prove compliance.
- Creates a Revenue Stream: Retired laptops are not necessarily worthless. Through professional IT buyback programs, functional components or entire units can be refurbished and resold, potentially converting a disposal cost into a revenue source.
Working with an expert helps establish a structured process that not only manages risk but also aligns with your company's financial and social objectives. To develop an effective program, it is beneficial to understand what IT asset disposition entails and how it integrates into your overall IT lifecycle management strategy.
Answering Your Top Questions About Hard Drive Disposal
After a hard drive is removed, critical decisions must be made. For IT managers and business leaders, the next steps are high-stakes, with potential consequences ranging from compliance violations and data breaches to missed financial opportunities.
These are the most frequent questions we receive from our enterprise clients. Here are the clear, business-focused answers you need.
Is It Better to Physically Destroy a Hard Drive or Wipe It?
This is a fundamental question in ITAD strategy: total destruction versus secure sanitization. The correct choice depends on your organization's data sensitivity policies and asset management goals.
- Physical Destruction (Shredding): This is the mandatory choice for drives containing sensitive intellectual property, proprietary financial data, or information regulated by laws like HIPAA. Destruction provides an absolute 100% guarantee that the data is irretrievable. It is the ultimate security measure when risk tolerance is zero.
- Data Wiping (Sanitization): This software-based process uses standards like NIST 800-88 to overwrite every sector of the drive, rendering the original data unrecoverable. This is the ideal option for functional drives with residual value, allowing the drive or the entire laptop to be safely resold, donated, or redeployed.
This decision directly impacts your budget. Research shows a significant conflict between security and value recovery; one study revealed that while 50% of retired drives are physically shredded, a staggering 47% of those destroyed assets were still fully functional. This represents billions in lost value across industries. You can read the full research on this hardware lifecycle dilemma to understand the financial implications.
Can I Reuse a Hard Drive I Removed from an Old Company Laptop?
Technically, yes, but for any business application, the answer should be an emphatic no. Re-deploying a used drive without professional-grade sanitization creates a significant security vulnerability. It is impossible to be certain that all residual data from the previous user has been completely eradicated.
Re-deploying an unsanitized drive is the corporate equivalent of giving a new employee a file folder containing the previous employee's confidential notes. It is a compliance failure waiting to happen.
If the drive is intended for a personal, non-sensitive project, a thorough data wipe is mandatory. For any corporate use, however, the only compliant and secure options are to have the drive professionally sanitized for resale or physically destroyed by a certified vendor.
What Documentation Do I Need for Compliance?
Documentation is your legal defense. When you dispose of hard drives that have stored any business or customer data, you must be able to prove you did so in a compliant manner. Simply handing equipment to a recycler without a documented chain of custody is not sufficient.
The most critical document is a Certificate of Data Destruction. This official record, provided by a certified ITAD partner like Beyond Surplus, formally transfers the liability for the data from your company to the vendor. It is your auditable proof that every drive was managed and destroyed according to industry standards.
Your certificate must include:
- The specific method used (e.g., shredding, NIST 800-88 wipe)
- A detailed list of the unique serial numbers for each drive
- The exact date of destruction
- A clear statement of liability transfer
Without this certificate, your organization remains legally and financially responsible for any subsequent data breach. It is the absolute cornerstone of a defensible and secure data disposition program.
For a secure, compliant, and documented approach to managing your end-of-life IT assets, trust the experts. Contact Beyond Surplus for certified electronics recycling and secure IT asset disposal services at https://technostolic.com.